Tuesday 24 September 2019

More Empress Insurgents!

More Empress Insurgents!

Just some reinforcements for my Insurgents because you can never have too many! More of my Empress minatures purchase, now to move onto my Spectre bad guys.

Got himself some kneepads!

Ready to add some punch.

Dodgy trousers.

I was inspired to paint the shirt having seen it online, not up to their standard though.

My effort at DPM, this figure changing his magazine is one of my favourites.
Just the five this time, tried out a few different things such as the camo patterns, and some different highlights but more importantly a new pot of Agrax earthshade. This seems to be so much better than my last pot at finding all the little detail, maybe I'm just getting better at using it with all the painting I'm doing.

First Spectre Battle Report.
Second Battle Report 'The Chechen'


Saturday 14 September 2019

Bolt Action Battle Report

Bolt Action Battle Report.

To the Desert finally!

The Blog is working, inspired by our push on Spectre we decided to push on with our Bolt Action Desert project. I had painted a box of Warlord 28mm British and some extras. Lee my opponent on the other hand hadn't finished. We were a bit short on desert terrain so whilst he painted, I built a small trench and some rocks, not a lot in the two weeks we gave ourselves but we'd stalled for too long. This time I tried to take more photos, but some were a little rushed.

The Table


First a quick description of the table:
  • Top, large building, with trench next to it.
  • Middle, ruins with some walls stretching across the centre.
  • Bottom, ruins, and some rock formations.
So with some additional scatter, boxes and small sections of wire, and two hills under the mat we were ready. We had broken up some lines of sight, but there was a lot of open ground.


The 8th Army


First Lieutenant with SMG, two men with rifles.

Free Observer

1 Section, Nco with SMG, and LMG

2 Section, Nco with SMG, and LMG

3 Section, Nco with SMG, and LMG

Vickers MMG
We played 500pts as this was Lee's first game and my 3rd, as you can see it's a platoon with a tiny amount of support.

The Afrika Korps


Lee had slightly smaller sections, otherwise the composition was pretty similar with;
  • 1st lieutenant
  • 50mm mortar team
  • Medic
  • 1 Section, Nco with SMG, and LMG
  • 2 Section, Nco with SMG, and LMG
  • 3 Section, Nco with SMG, and LMG
  • Mg34 MMG team


The Game.

For our first game we decided on Meeting Engagement. Both of us had read through the rules so we just cracked on. Plenty of pics this time to tell the story.

Turn 1
1st British section runs towards the villa.

The Afrika Korps join the race for the villa, who will be victorious?
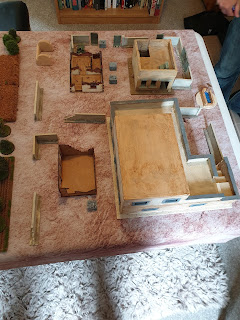
The 2nd British section runs for the trench system next to the villa.
Afrika korps MG 34 runs on to get in position hoping to get the dice next turn before the British. To the left they are joined by another section.


The rest of the turn went pretty quick with both of us holding the rest of our force in reserve.

Turn 2
The germans abandon the race for the Villa and head towards the British hoping to get into a position to support the MG 34, which also runs forward hoping for a better position. 

At this point we discussed that the trench was dug in and didn't block line of site. Lee was happy with this bearing in mind I would probably get to fire first.
Lee then drew two more dice consecutively advancing his other Section, with nothing to fire at. He was being cautious as to advance to far would leave him in the open and exposed, with me able to bring on troops opposite. His second dice was used to keep his 50mm off the table.


My Section sees the exposed Mg34 and fires at it causing 2 dead and a pin, it was at long range and 4 hits managing 2 kills which was very frustrating for Lee when it hadn't even fired.

Next up was me again and I rolled for my Vickers which passed the test and came on inbetween my two sections. I now had a lot of firepower on this end of the table, two sections, the Vickers and then I added my forward observer aswell. My dice again and I ran my other Section into the Villa, looking to pass through it and out flank Lee. A roll for my third Section in reserve saw it go Down and fail to come on, they would have to wait a little longer.
Next up was my Officer running into the ruins on the right, ready to be inbetween two of my sections when the third finally arrived.
Lee's dice were all that was left in the bag and he ran on his mortar and medic into some ruins. He kept his Officer off ready to come on where he might help the most.

Turn 3

My Vickers fired at the section near the Villa, causing a pin, and with a brief interruption by a german section trying to fire at something out of range, my Section near the trench joined in. The Germans went Down this time, yet sixes were rolled and 2 casualties and a pin were the result.

As the German Medic got closer in behind some ruins, my third section advanced onto the table opposite another German section. Firing ensued and my dice rolls seem to be slowly reaping rewards with another 2 casualties and a pin.
The German sections are 8 man compared to the British 10 man, so aren't looking to brilliant after 6 casualties.

However Lee rolls a handful of dice for his other Section shooting at mine near the trench, only to cause a pin and nothing more. The Mg34 joins in and with 1 crewmen he obviously cant keep up the rate of fire required and only manages a pin aswell.

My Officers  bodyguards advance, fire, and miss, only serving to show Lee that his section may have a better target next turn. Lee's 50mm Mortar runs on to support his left flank with his Officer. This tells me that it's his main effort.
My main effort is obviously the opposite with the Forward observer going round the Villa and....

My other Section exiting the Villa coming round behind he Germans, with everything riding on who draws the first dice next turn.

Turn 4
Lee has the first dice and fires at the Section opposite missing!

Now we played at Lee's with the kids running round which may have distracted him from the Close Assault that was on the horizon!


 I get the next dice out the bag and moved my section into Close Assault! We read and re read the rules, and it's safe to say the Germans were wiped out to a man with some exceptionally high rolling, lots of sixes, it was brutal, the section rolled a one to regroup and got ready to move toward the Mg34. 


The Mg34 wasn't gonna just rollover, luckily a slight rise and the rocks gave the Section some cover, and the Mg34 only managed a pin marker.


Top, German Section advances and fires at my Officer in the ruins inflicting a pin, then my Section returns fire from near the trench causing a casualty and a pin. 
Bottom, the German Mortar and Medic both run closer to the action, with the Officer just out of view doing the same.

Near the trench the Vickers heads for it and so does the Forward observer having changed direction.


Turn 5

Using Snap to, the Officer orders this section to fire causing 2 casualties in the blurry distance on my Section near the trench. 


The 50mm is also ordered into action hitting the Section opposite them first time on the left causing them to go down, take a pin and a casualty. A couple of order dice later the section nearby also add another casualty and pin. They weren't going anywhere quickly.

Meanwhile those order dice in between meant, the Mg34 is wiped out and...


The Forward observer reaches the trench. Finally someone is using the terrain I built. The Vickers inflicts a pin and 2 casualties on the nearby german section. The British Officer orders his men to add to the destruction and they miss completely again.


My last Section runs forward keeping close to the wall so as not to block the Vickers line of sight.


Turn 6


My Vickers inflicts another casualty on this Section, who with help from their nearby Officer and Snap to, fire at my Officer causing him to go down. To no avail though both of his bodyguards become casualties. The 50mm is also ordered into action needing a 2+, and Lee rolls a 1!


The Germans left Flank targets my Section opposite, they go down, but take a pin and a casualty. The Forward observer moves along the trench and my other Sections begin to close in on the Germans, who appear to be boxed in the corner.


Slowly surrounding the Germans in the top left.


Turn 6..???
Spot the mistake?
That's right another turn six, only realised once I came to edit the report. Whilst we were playing we stopped to eat a roast dinner and somewhere we got confused!


This turn happened really quickly, and fewer pictures were taken, the Vickers and a nearby Section targeted the Germans in the open and wiped them out.

The 50mm missed again, only to be wiped out with my nearby section next dice.

My Forward observer used his rifle causing Lee's Officer to go down and missed. 

He last German section fired at my heavily pinned section, they went down but still lost a man.

The brave British Officer ran behind the nearest wall.

The German Medic did what he had done most of the game and went down behind the wall again.

We thought that was it but we rolled another turn, was the German force to be totally annihilated?


Turn 7 actually 8

First up was my Section who dealt with the German Officer before he could "snap to" any one else. 
My heavily pinned Section needed a four to activate, promptly failed and went down.
It's not cricket, but the Forward observer targeted the Medic and he was casualty, obviously not a big reader of the Geneva Convention.
Lee finally pulled a dice and hoped to cause my pinned section problems. They were already down and only suffered a pin. 
My final Section targeted the German section causing only a pin and casualty.
My Officer ran and hid some more!


So who won? Obviously the British who only sustained 9 casualties compared to the Germans 26! Although it took 2 hours to play with interruptions it was a fast game, and whilst we checked the rules a few times it was really easy to pick up. I'd played before but that didn't mean I knew the rules well. The dice bag and orders make for an unusual run of play meaning you have to plan ahead, which both of us constantly forgot. 

Now as I look back we need to keep an eye on counting our turns whoops!


Thursday 5 September 2019

The Chechen! Battle Report

The "Chechen"

Wow another Spectre rules battle report so soon! In truth we had time after the last game and quickly put together a scenario. The rules are perfect for this, we didn't read the extras, we just let our minds wander.

The crops, trees and fields on the left mark the table edge and make it more picturesque for all the photos I forgot to take.

The Scenario: The "Chechen"

A British patrol has received a tip off that an SVD Dragnov is in an arms cache nearby. The source has given three possible locations within a small area of construction. Due to the time sensitive nature of the tip off they have proceeded to the sparsely populated area, with the intention of denying the Insurgents this weapon.

Locating the weapon will win the British the game, if the "Chechen" recovers his rifle and leaves the table the Insurgents win.

The Forces:

The British,

Professional Tier, Corporal has Sgt stats.
  • Corporal, Assault rifle with scope, pistol, frag, smoke.
  • Sharpshooter, DMR with scope, pistol, frag, smoke.
  • Rifleman 1, Assault rifle with scope, UGL, frag, smoke.
  • Rifleman 2, Assault rifle with scope, frag, smoke.
  • Rifleman 3, Assault rifle with scope, frag, smoke.
  • Rifleman 4, Assault rifle with scope, frag, smoke.
  • Rifleman 5, Assault rifle with scope, frag, smoke.
  • Rifleman 6, LMG, frag, smoke. (Rifleman figure stand in)
All have Body armour and battlefield trauma kits.

The Insugents:

Militia tier, Leader has Sgt stats.
  • Militia leader, Assault Rifle and frag.
  • Militia man, Lmg and frag.
  • Militia man, Assault Rifle,UGL, and frag.
  • Militia man, Assault Rifle and frag.
Locals/untrained
  • Man 1, possible Assault rifle?
  • Man 2,possible Assault rifle?
  • Man 3, possible Assault rifle?
The "Chechen"

Professional tier soldier stats.
  • The "Chechen", possible sniper rifle?
Notes:
  • For the British we have a rifleman representing a Minimi, to better reflect the section, something that was missing from the last game.
  • Should the British come across any unarmed locals they can detain them if necessary and question.
  • The locals have a rough area to work/patrol using basic movement, until the British appear in their LOS, or they hear them. Once seen by the British they can attempt to move out of LOS to pick up a weapon or contact reinforcements via phone. 
  • Reinforcements can only be called in the command phase after moving out of LOS, on a D6 3+, and appear on any table edge.
  • The "Chechen" can be warned after the reinforcements in the same way, D6 6+, reducing by 1 each turn. He appears randomly on the pre-selected hidden marker representing his rifle in the combat phase to represent him sneaking into position. 
The Battle:

With the 3 locals wandering around the British approach from behind the villa along the compound wall. Above them on the 1st floor veranda walking away from them is the first local. 
Next they move into the courtyard of the villa compound. They are spotted by the local and he vanishes inside appearing as Charlie fireteam breakdown and push up the outside steps to reach the first floor. Meanwhile Delta secure the compound entrance and move towards the front door. One has LOS of the local (marked as unarmed with a counter) he has him covered with his weapon and see's him raise an AK over the wall, he fires missing but causing him to be suppressed (failed the test), the untrained insurgent fires and misses. 

More importantly the firing has alerted everyone!

Charlie reach the 1st floor shooting the Insurgent before he can react. Delta move into the villa towards the 1st suspected cache site in the main room. Two civilians move towards the villa out of sight. One produces a weapon  moving towards a window, the other talks to someone on the phone.

Alerted by a local, an insurgent squad appears from the nearest table edge as Delta searches the lower floor and take aim through the windows and doorway with the armed local and fire. Some havent quite made the windows and the devastating barrage never happens. One Delta man drops the local. The minimi gunner closest to the door and enemy lobs a grenade only for it to bounce back and seriously wound himself, however it destroy the dummy cache. 


Charlie tries to move into position on the first floor to fire down on the Insurgents some of who charge inside to confront Delta!  
Delta attacks, what follows is close combat and shooting which Delta eventually wins, losing one, but another beating two insurgents in close combat. Unfortunately a local has moved in behind Delta and fires, and Delta suffers another casualty.
Meanwhile Charlie move to provide top cover and finally take out the sneaky local, only for the 'Chechen' to appear (random roll, no pics), on the opposite roof. He fires seriously wounding the sharpshooter before trying to make his escape, except the one exit leads him into the guns of Charlie team. Charlie exact revenge, and a costly search it was over. 

My thoughts:

This game was a lot faster, hence even less pictures, must try harder! We had an idea and Spectre's rules aloud it to play out. Having read on from the basics, there is everything and more to build on this scenario. Lee and I had fun and are planning our next game with maybe some different forces, but first we have to paint them.

Missed the first game?
Want to see the British?
Want to see the Insurgents?