Sunday 20 September 2020

NORTHAG Spetsnaz, Sheep and Cows!

 NORTHAG Spetsnaz, Sheep and Cows!


So one of the freebies with the pre order was a small team of Spetsnaz with a jeep. When I got it I chucked it in the to do box and cracked on with the tanks. Also in the box were some 10mm sheep and cows from Minibits, I wanted to add some fluff to the table and whilst buying bases from them I came across their range of animals. A pack of each found its way into the basket.
Having painted the bulk of the Russians I'd forgotten about the Spetsnaz. Sorting out the Command team for the Brits I found them and the animals, and with a game on the horizon, they were all added to the paint schedule. Unfortunately the animals never made the game, however an idea had formed for their use.

Brainwave!

The Spetsnaz are suppose to be sneaky and create panic, and their rules reflect that. They get two turns of immunity unless they fire first, but in the game once deployed they can be quickly surrounded and neutralised, but what if for those turns the enemy didn't know where they were, see where I'm going with this! Bases containing sheep and cows roaming the countryside and after two turns one is replaced with the Spetsnaz team. Some playtesting will be required but it might become a staple of our games, especially with SAS and other possible NATO stay behind teams causing havoc behind the Russian advance.

Painting the Spetsnaz

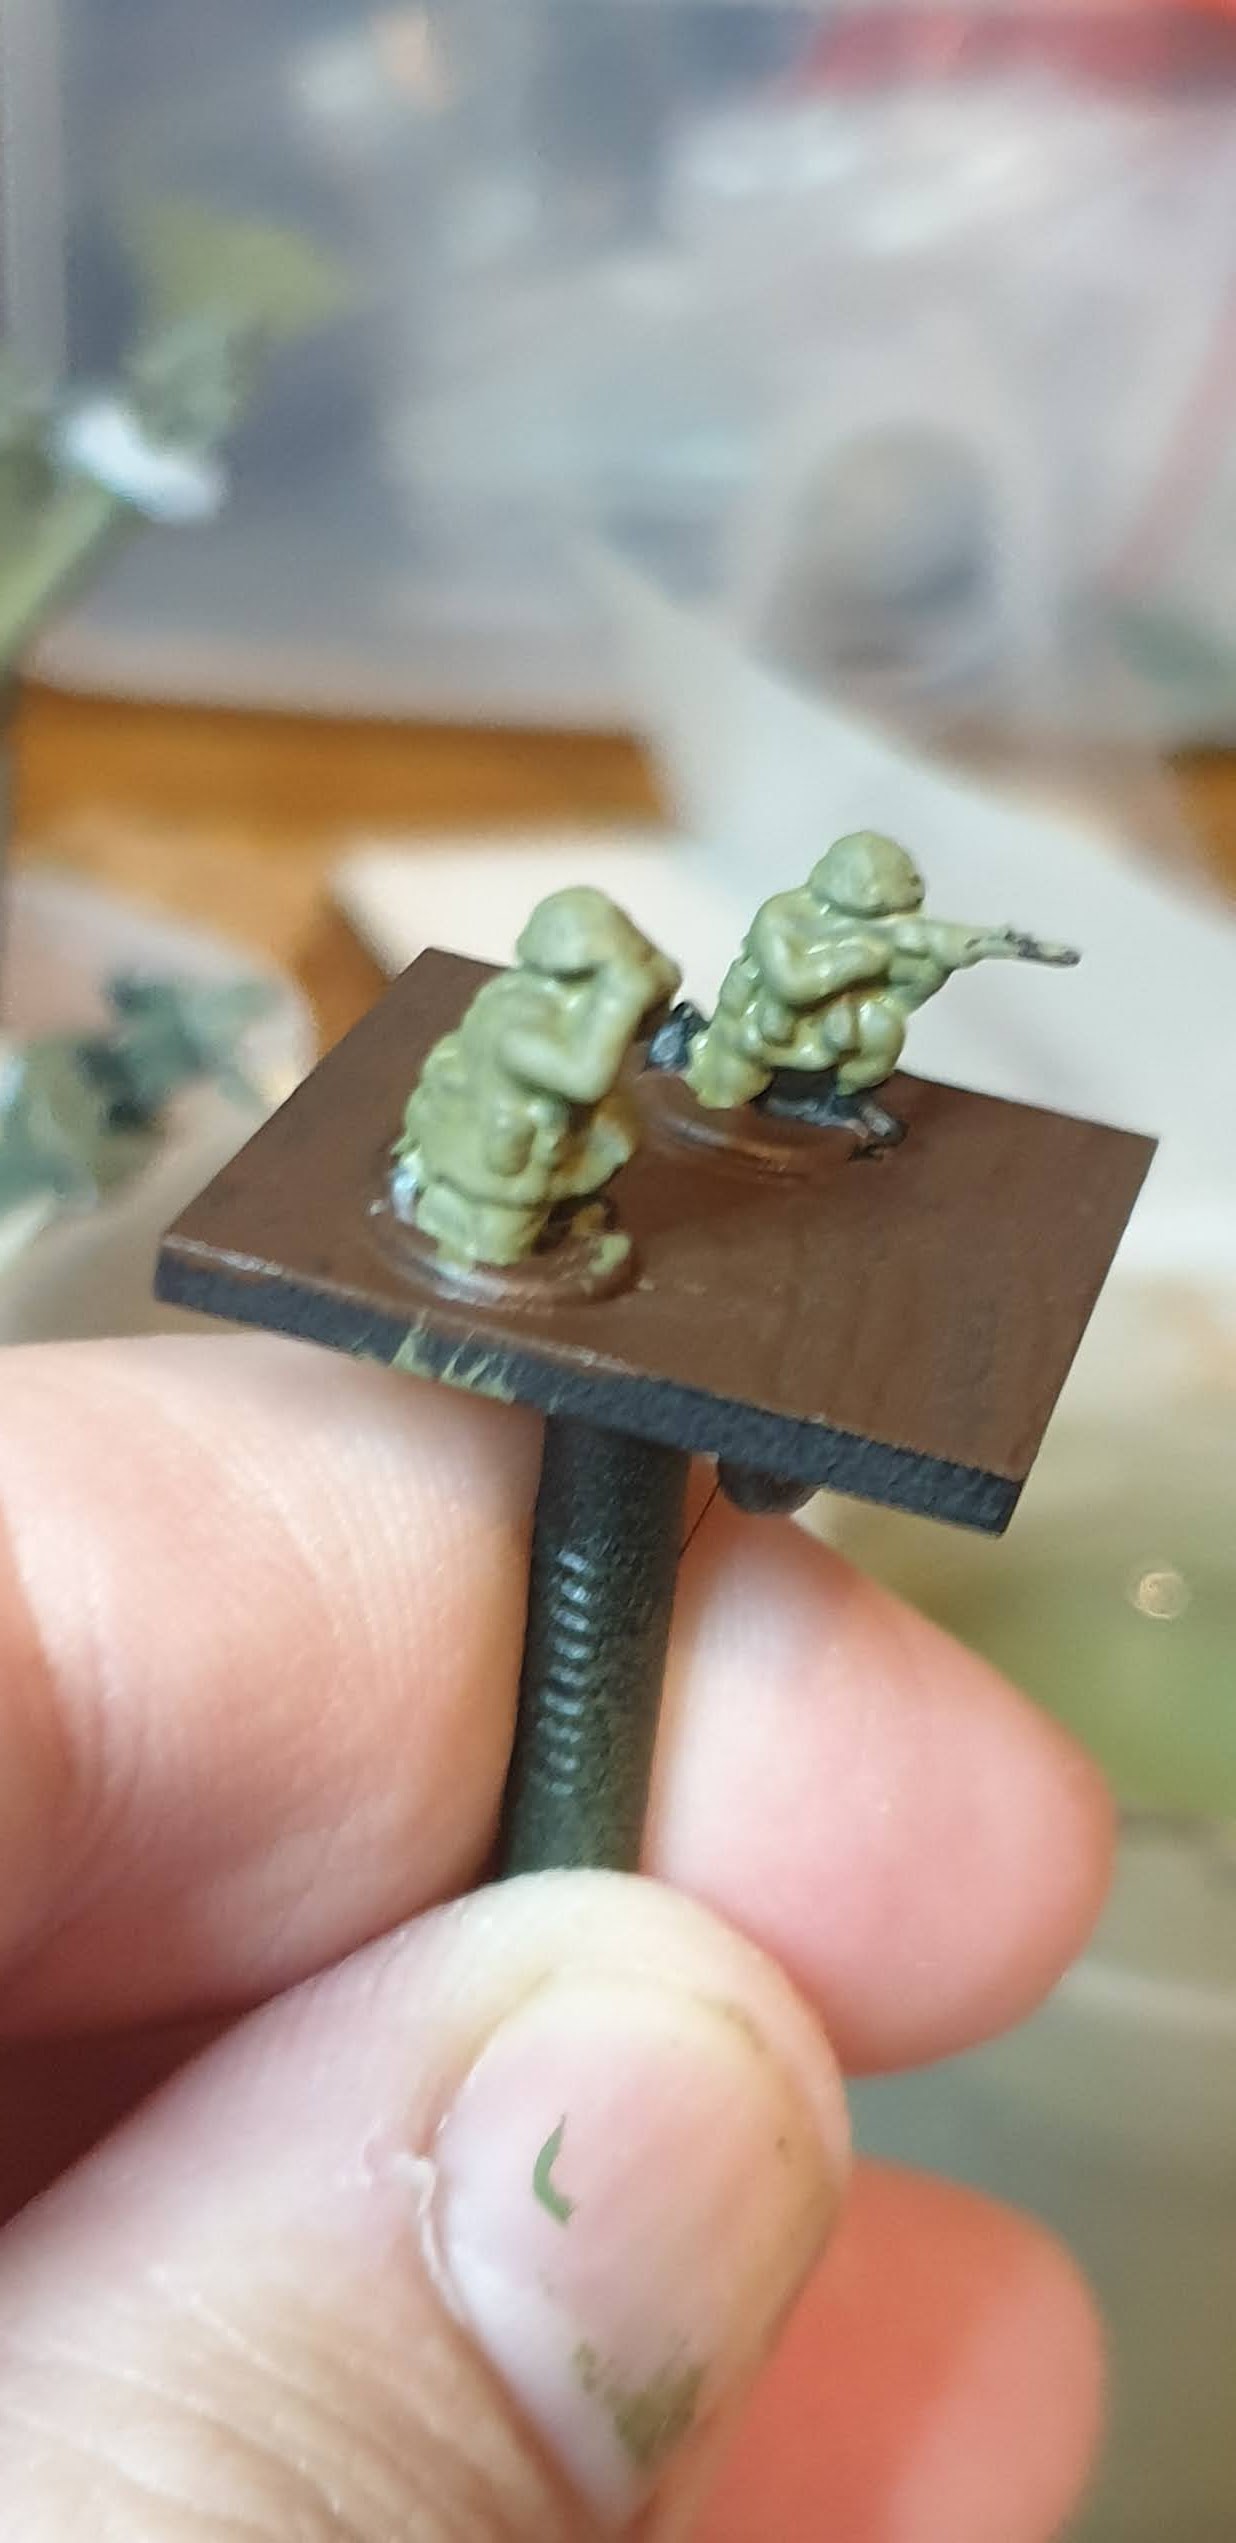
Quick blast with Black primer


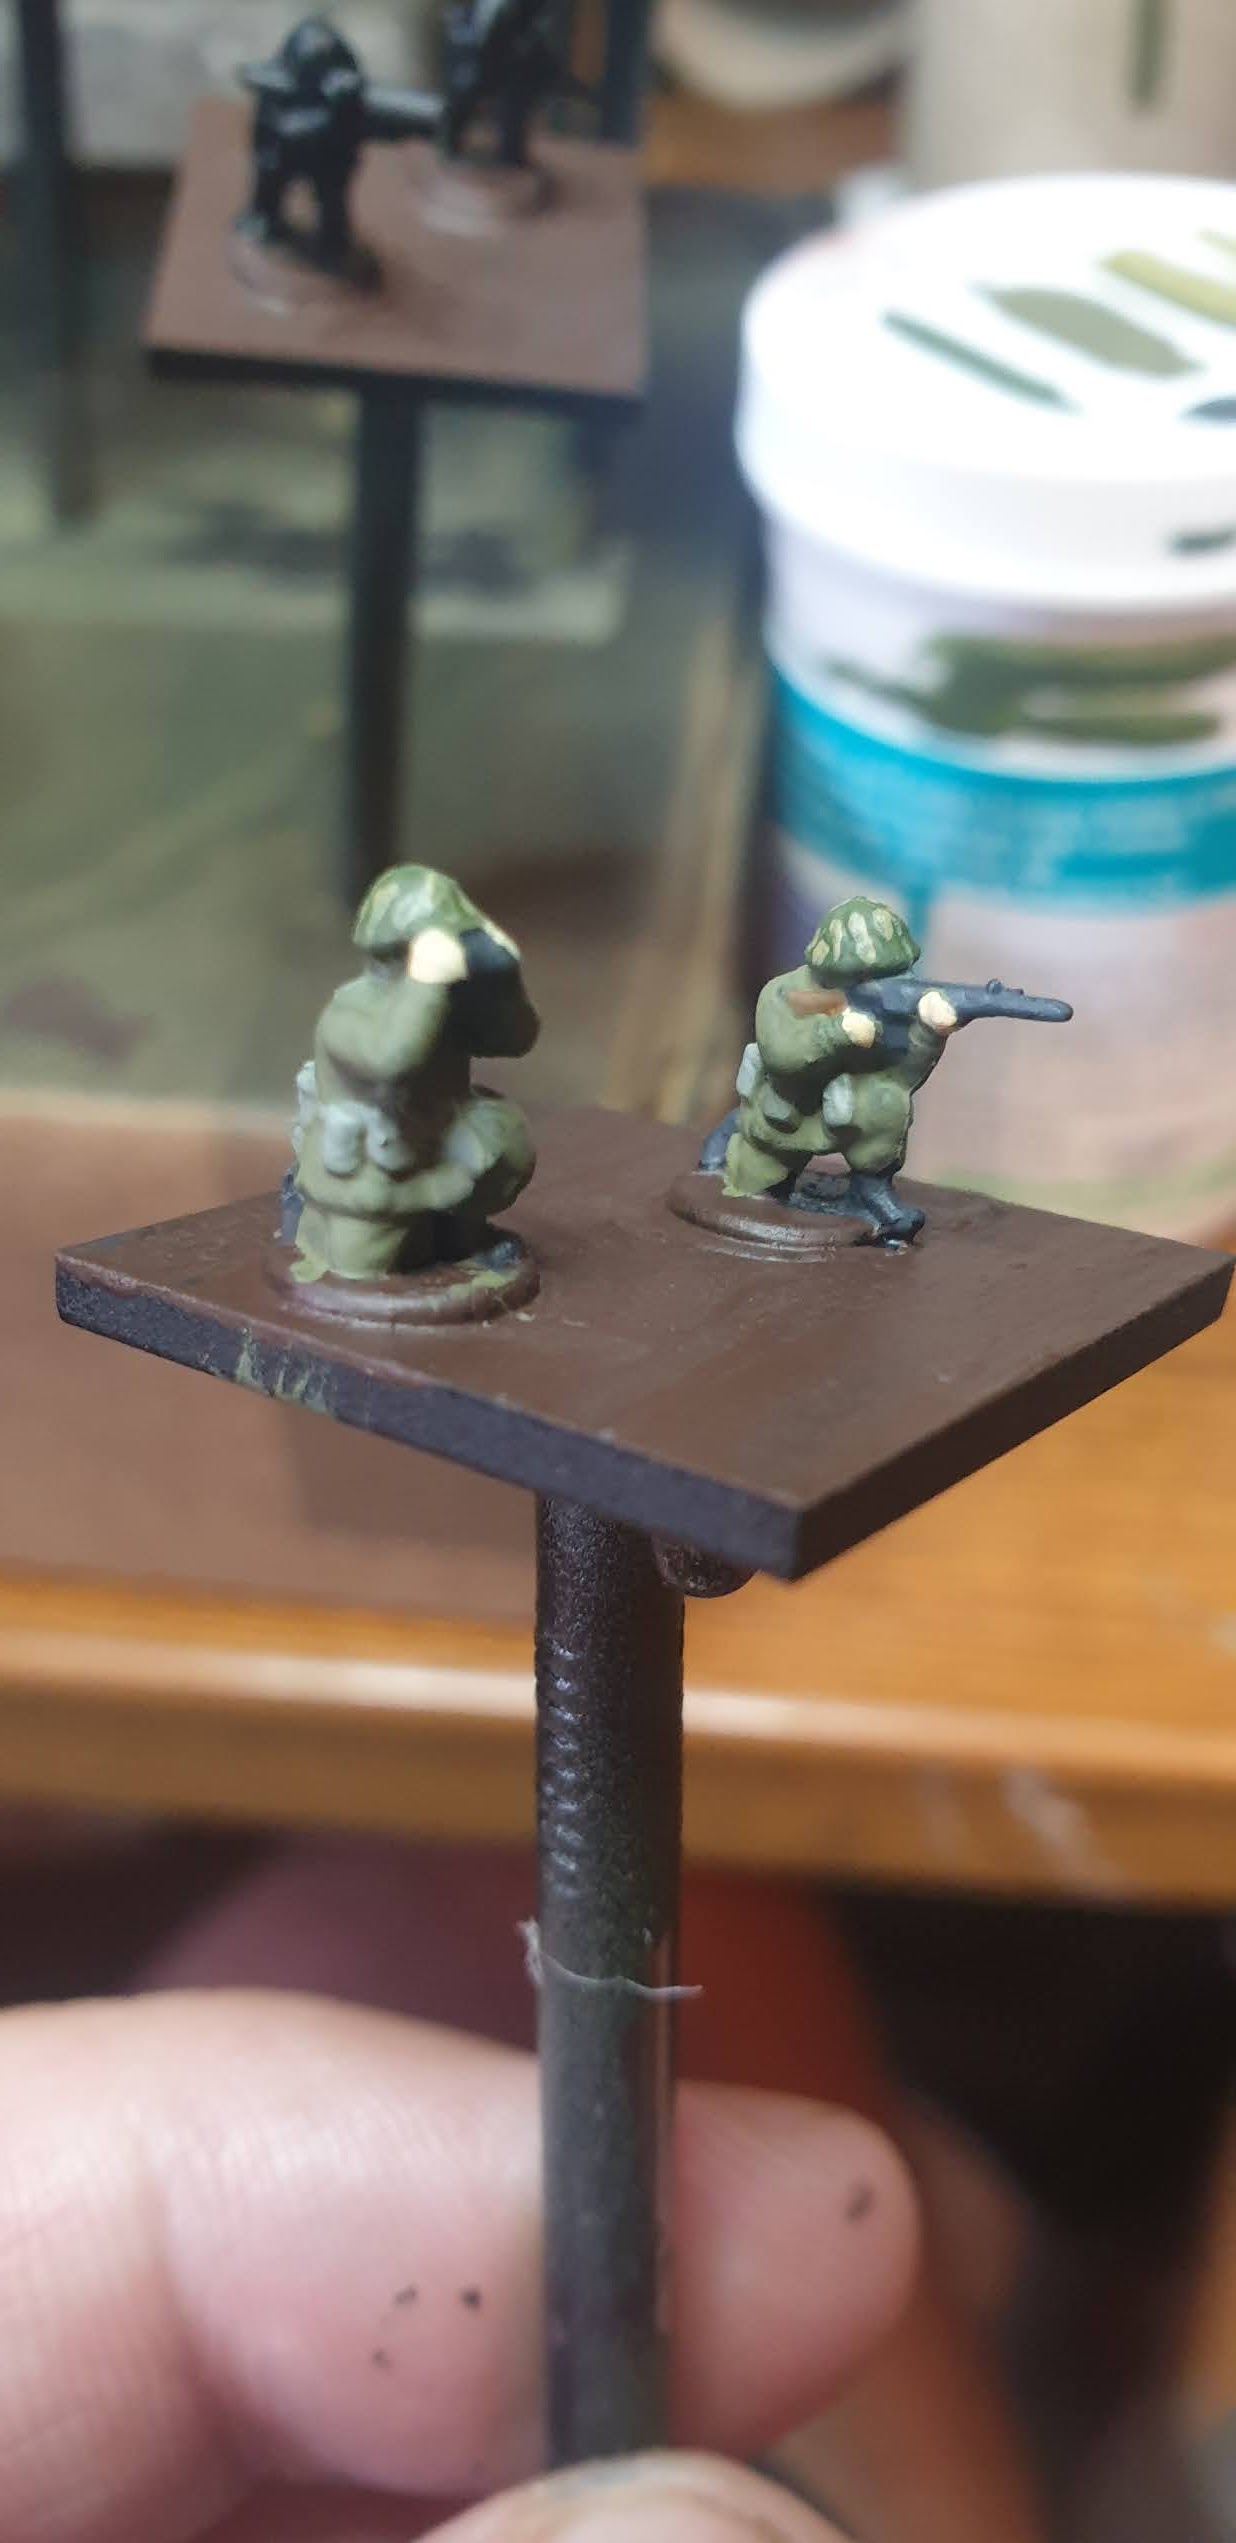
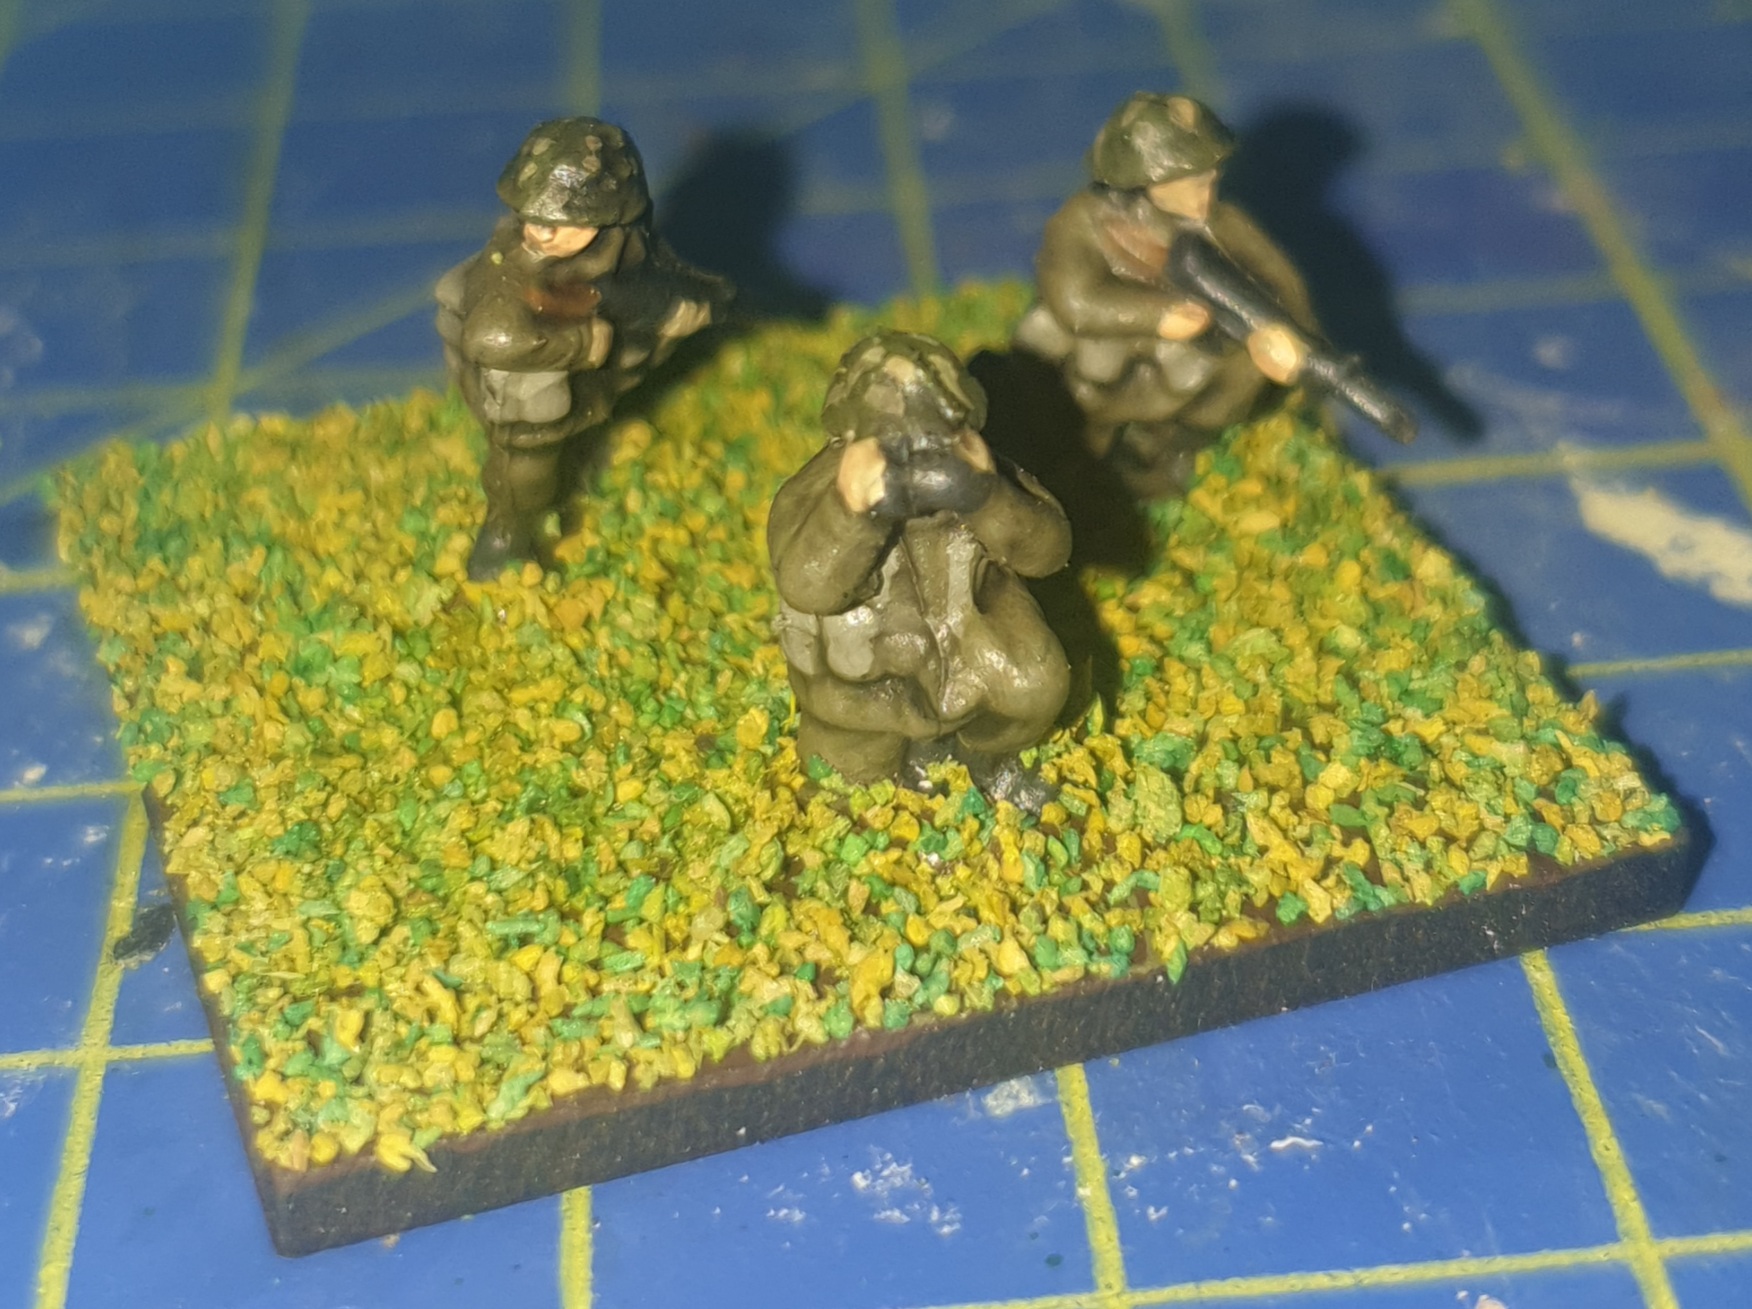
Sneaky Spetsnaz have managed to mix with British infantry in the background!


So the paint scheme was slightly different to that of my Russian Armour for the jeep.
  • Flames of war Russian Uniform 924, for the all over bascoat
  • Vallejo German Grey 70.995, for the wheels and canvas cover, khaki would also be a good colour for the canvas
  • Vallejo Luftwaffe Uniform 70.816, for the windows and again in the middle after the wash with a thin coat as a highlight
  • Citadel Nuln Oil wash all over the vehicle including the windows
  • Vallejo Stone Grey 70.884, a light Drybrush after the luftwaffe uniform as a highlight for the windows to represent light reflecting
  • Flames of war Light Brown 929, a heavy to light drybrush to simulate mud and dust starting at the bottom working your way up.
  • Vallejo Matt Varnish 70.520 for the finish

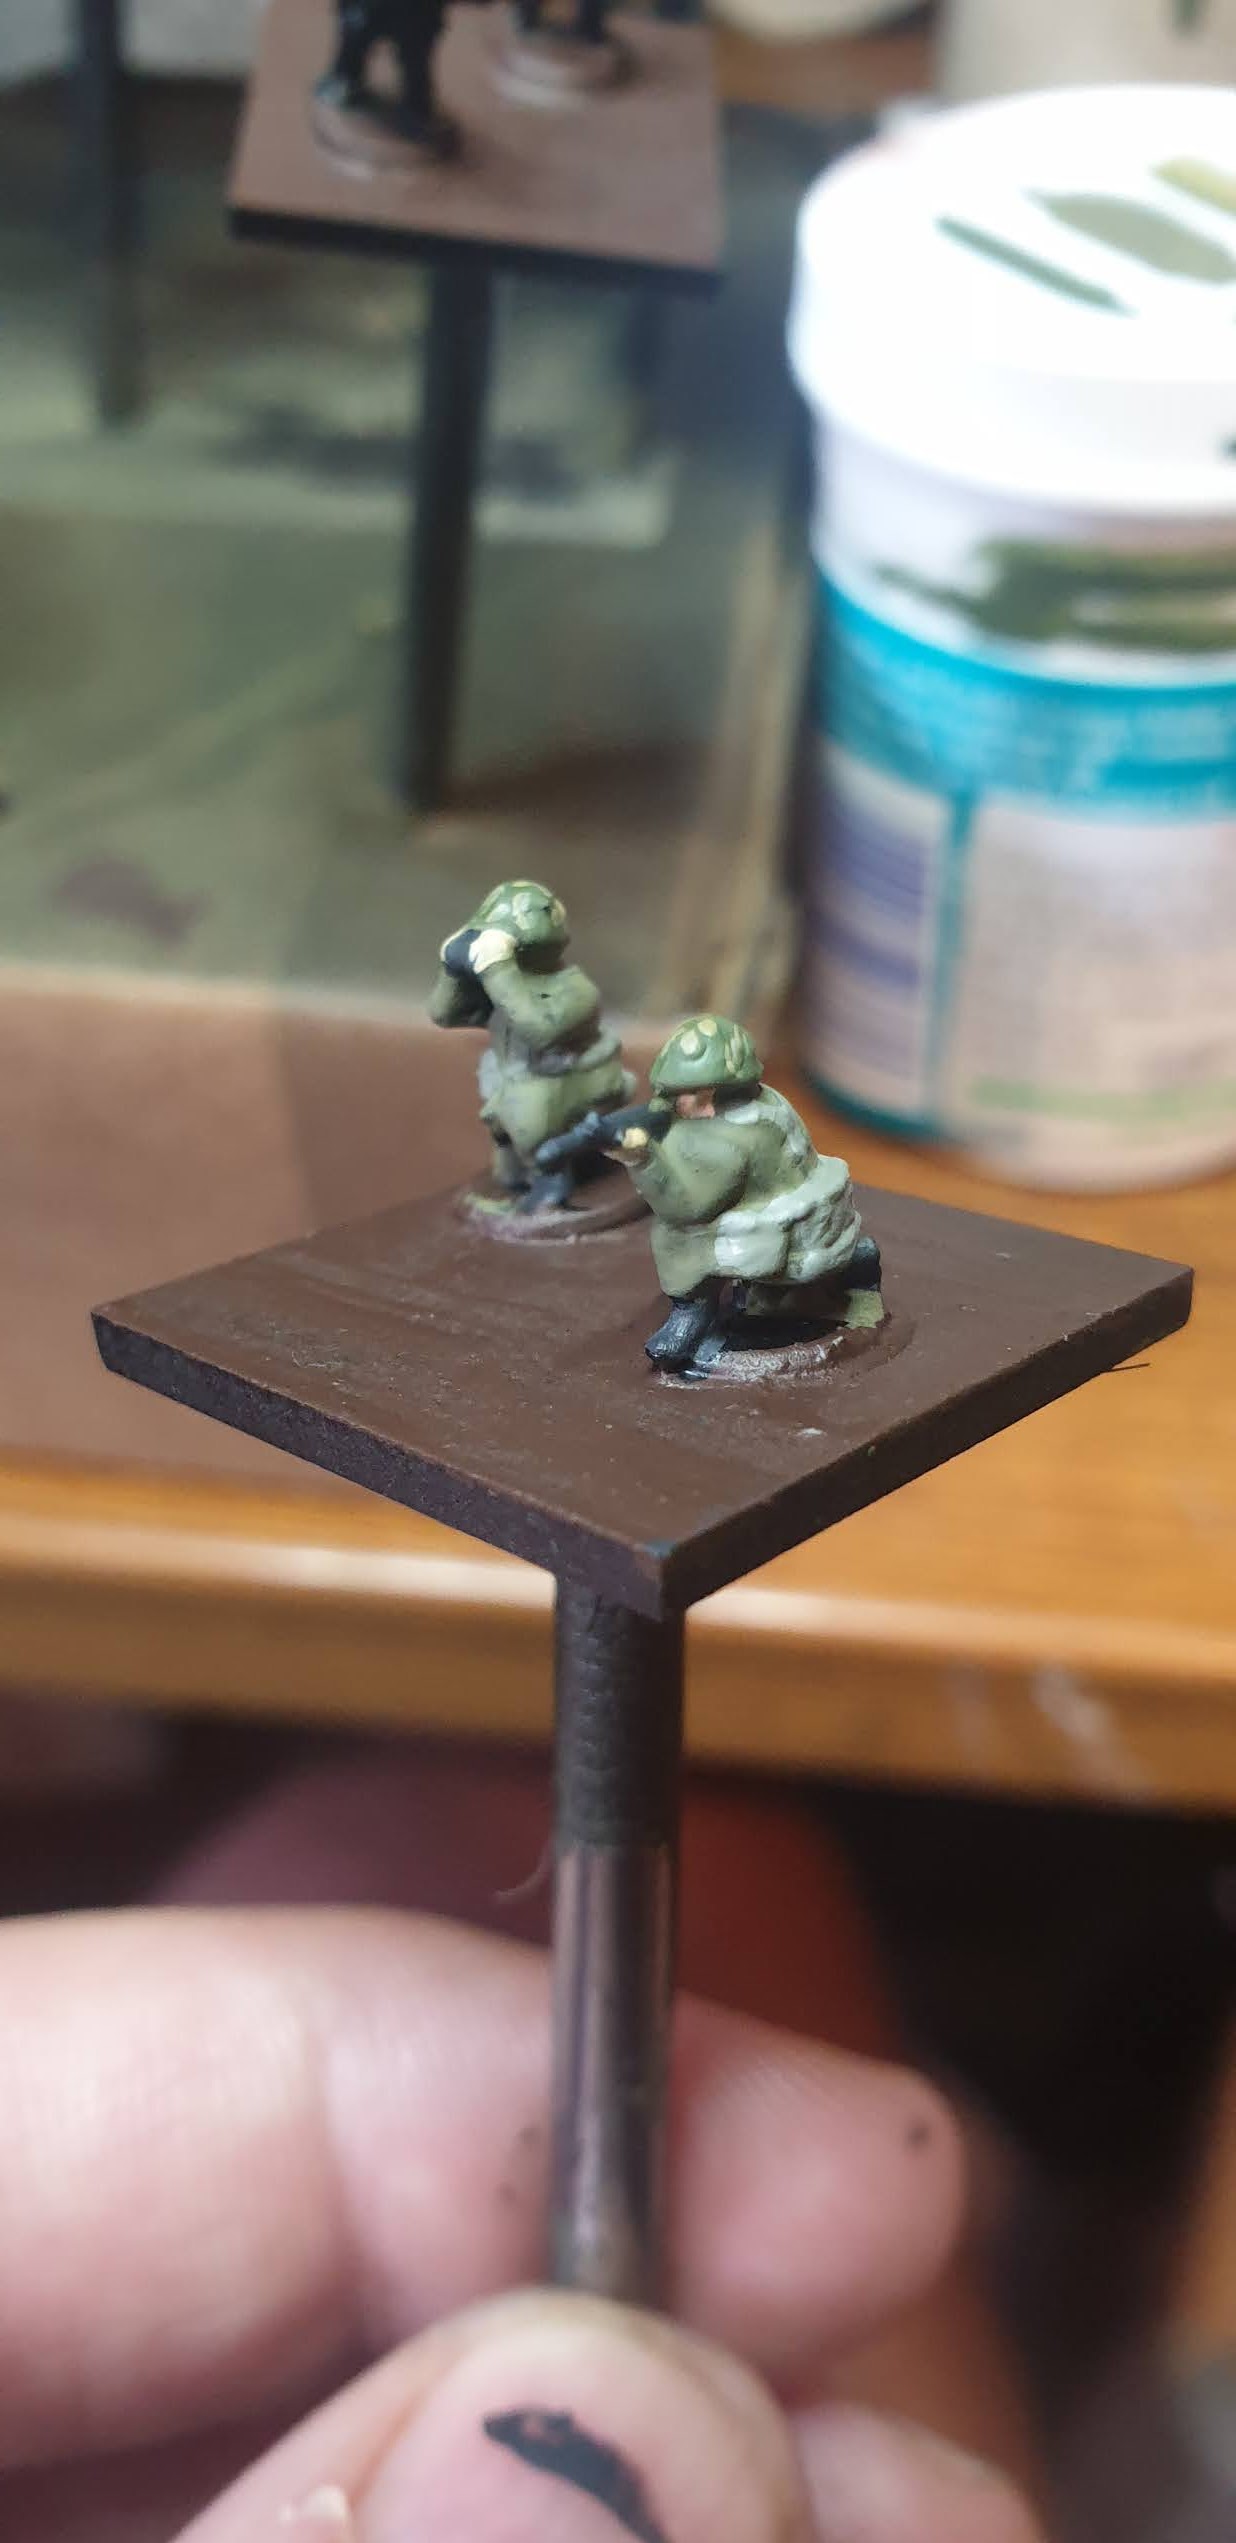
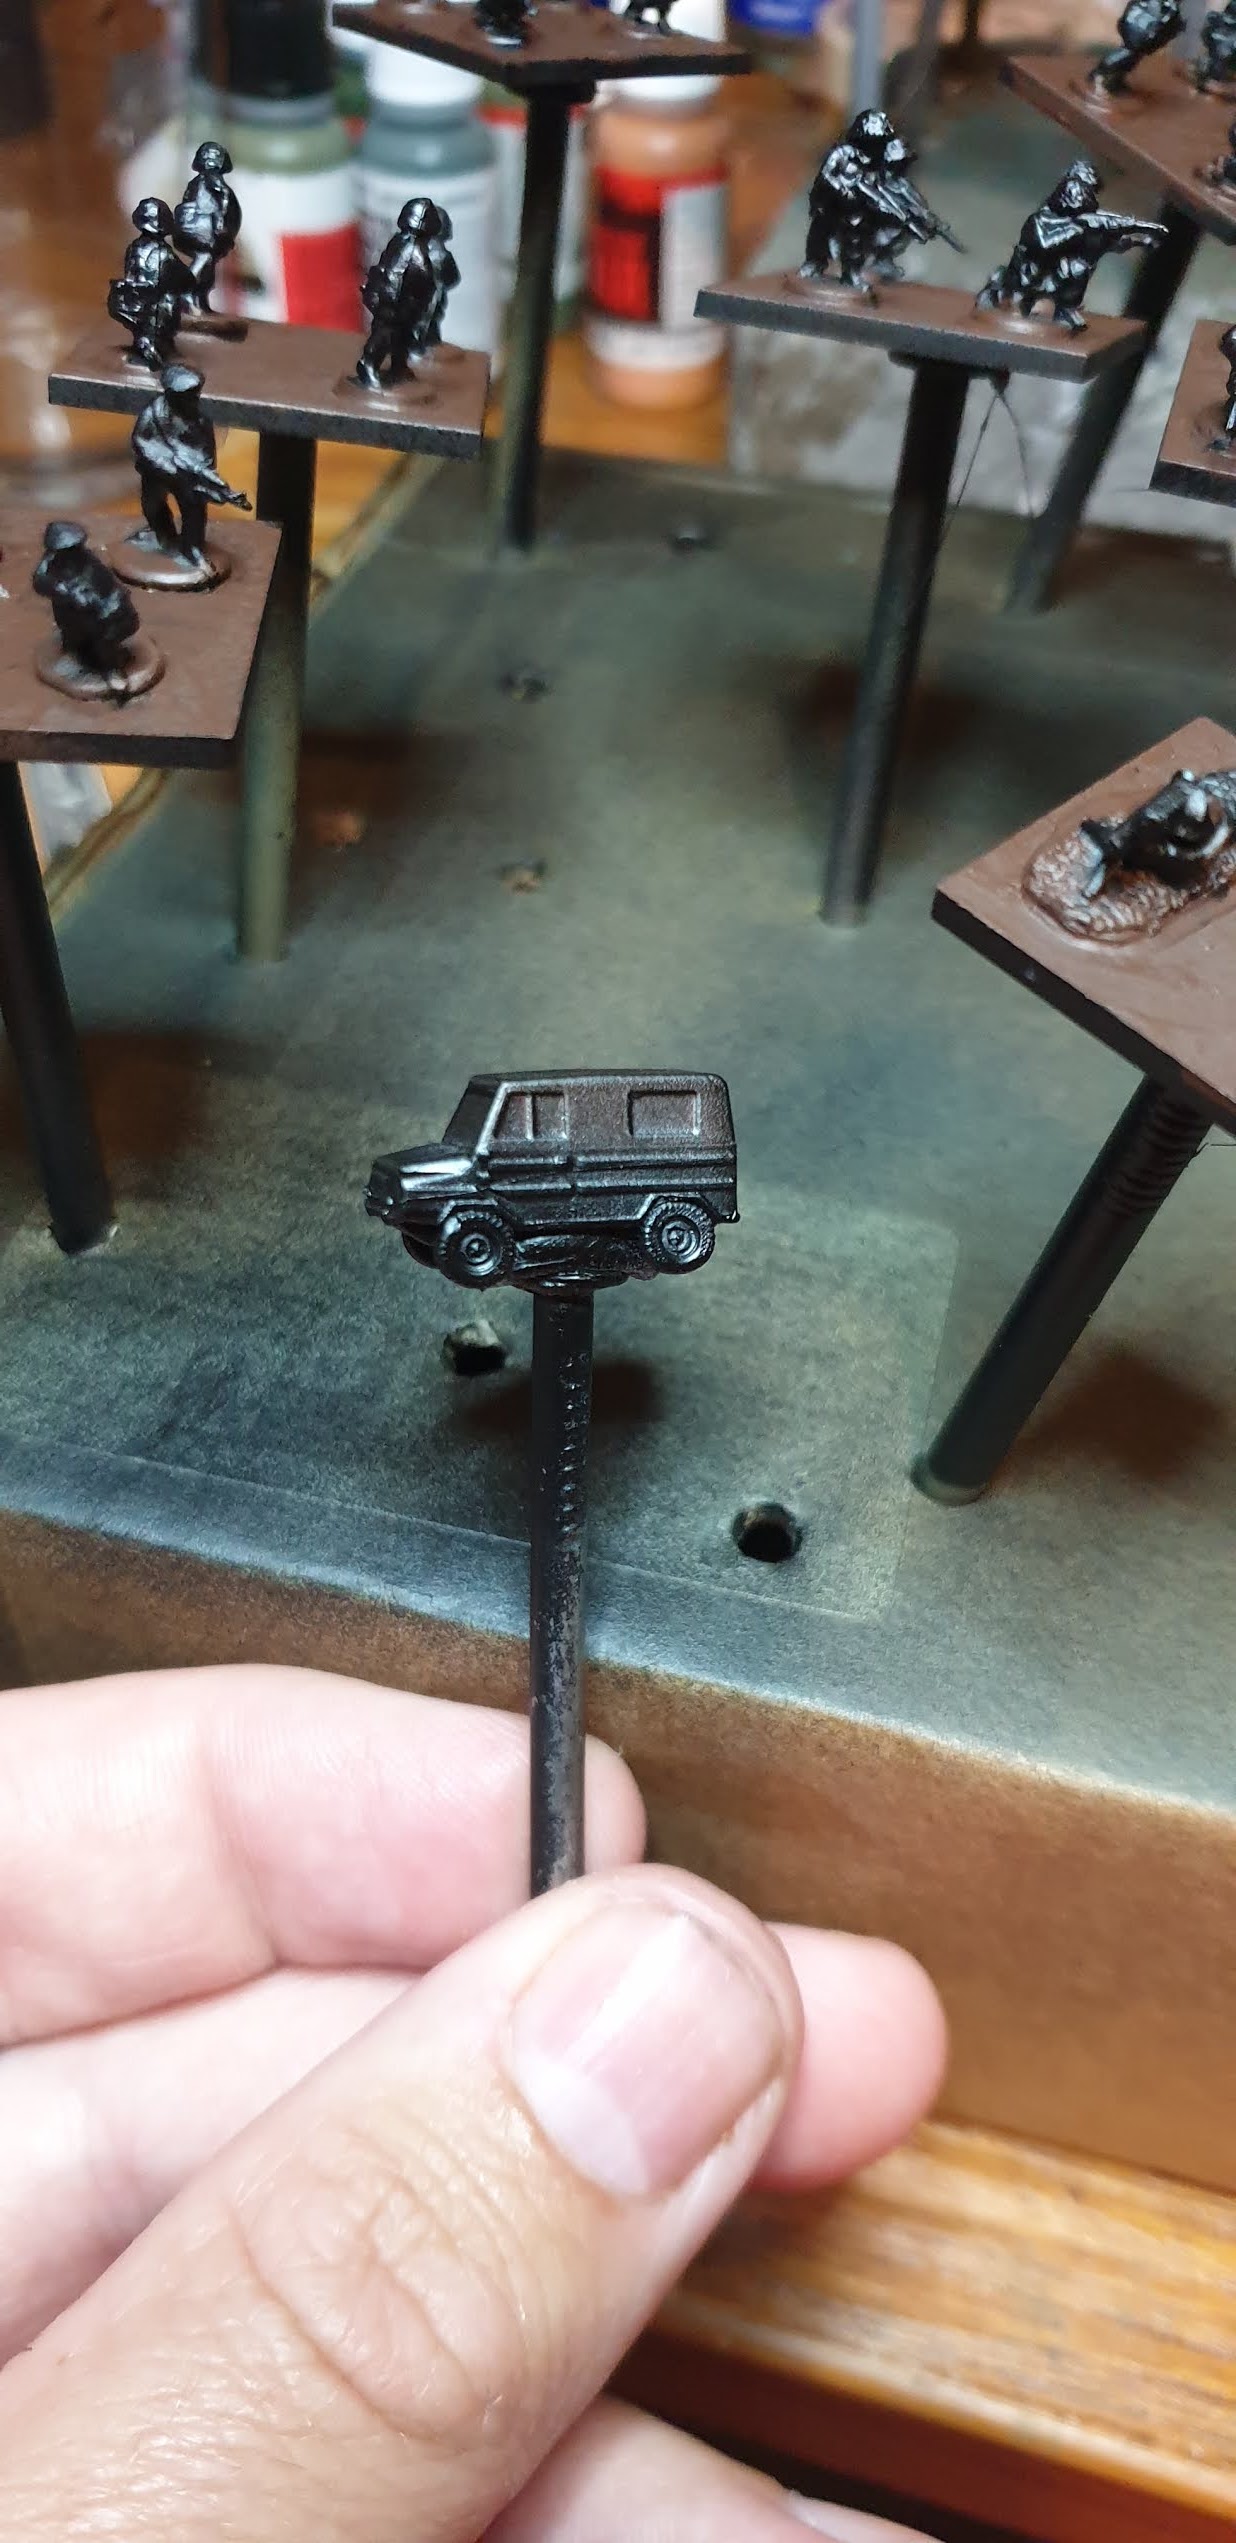
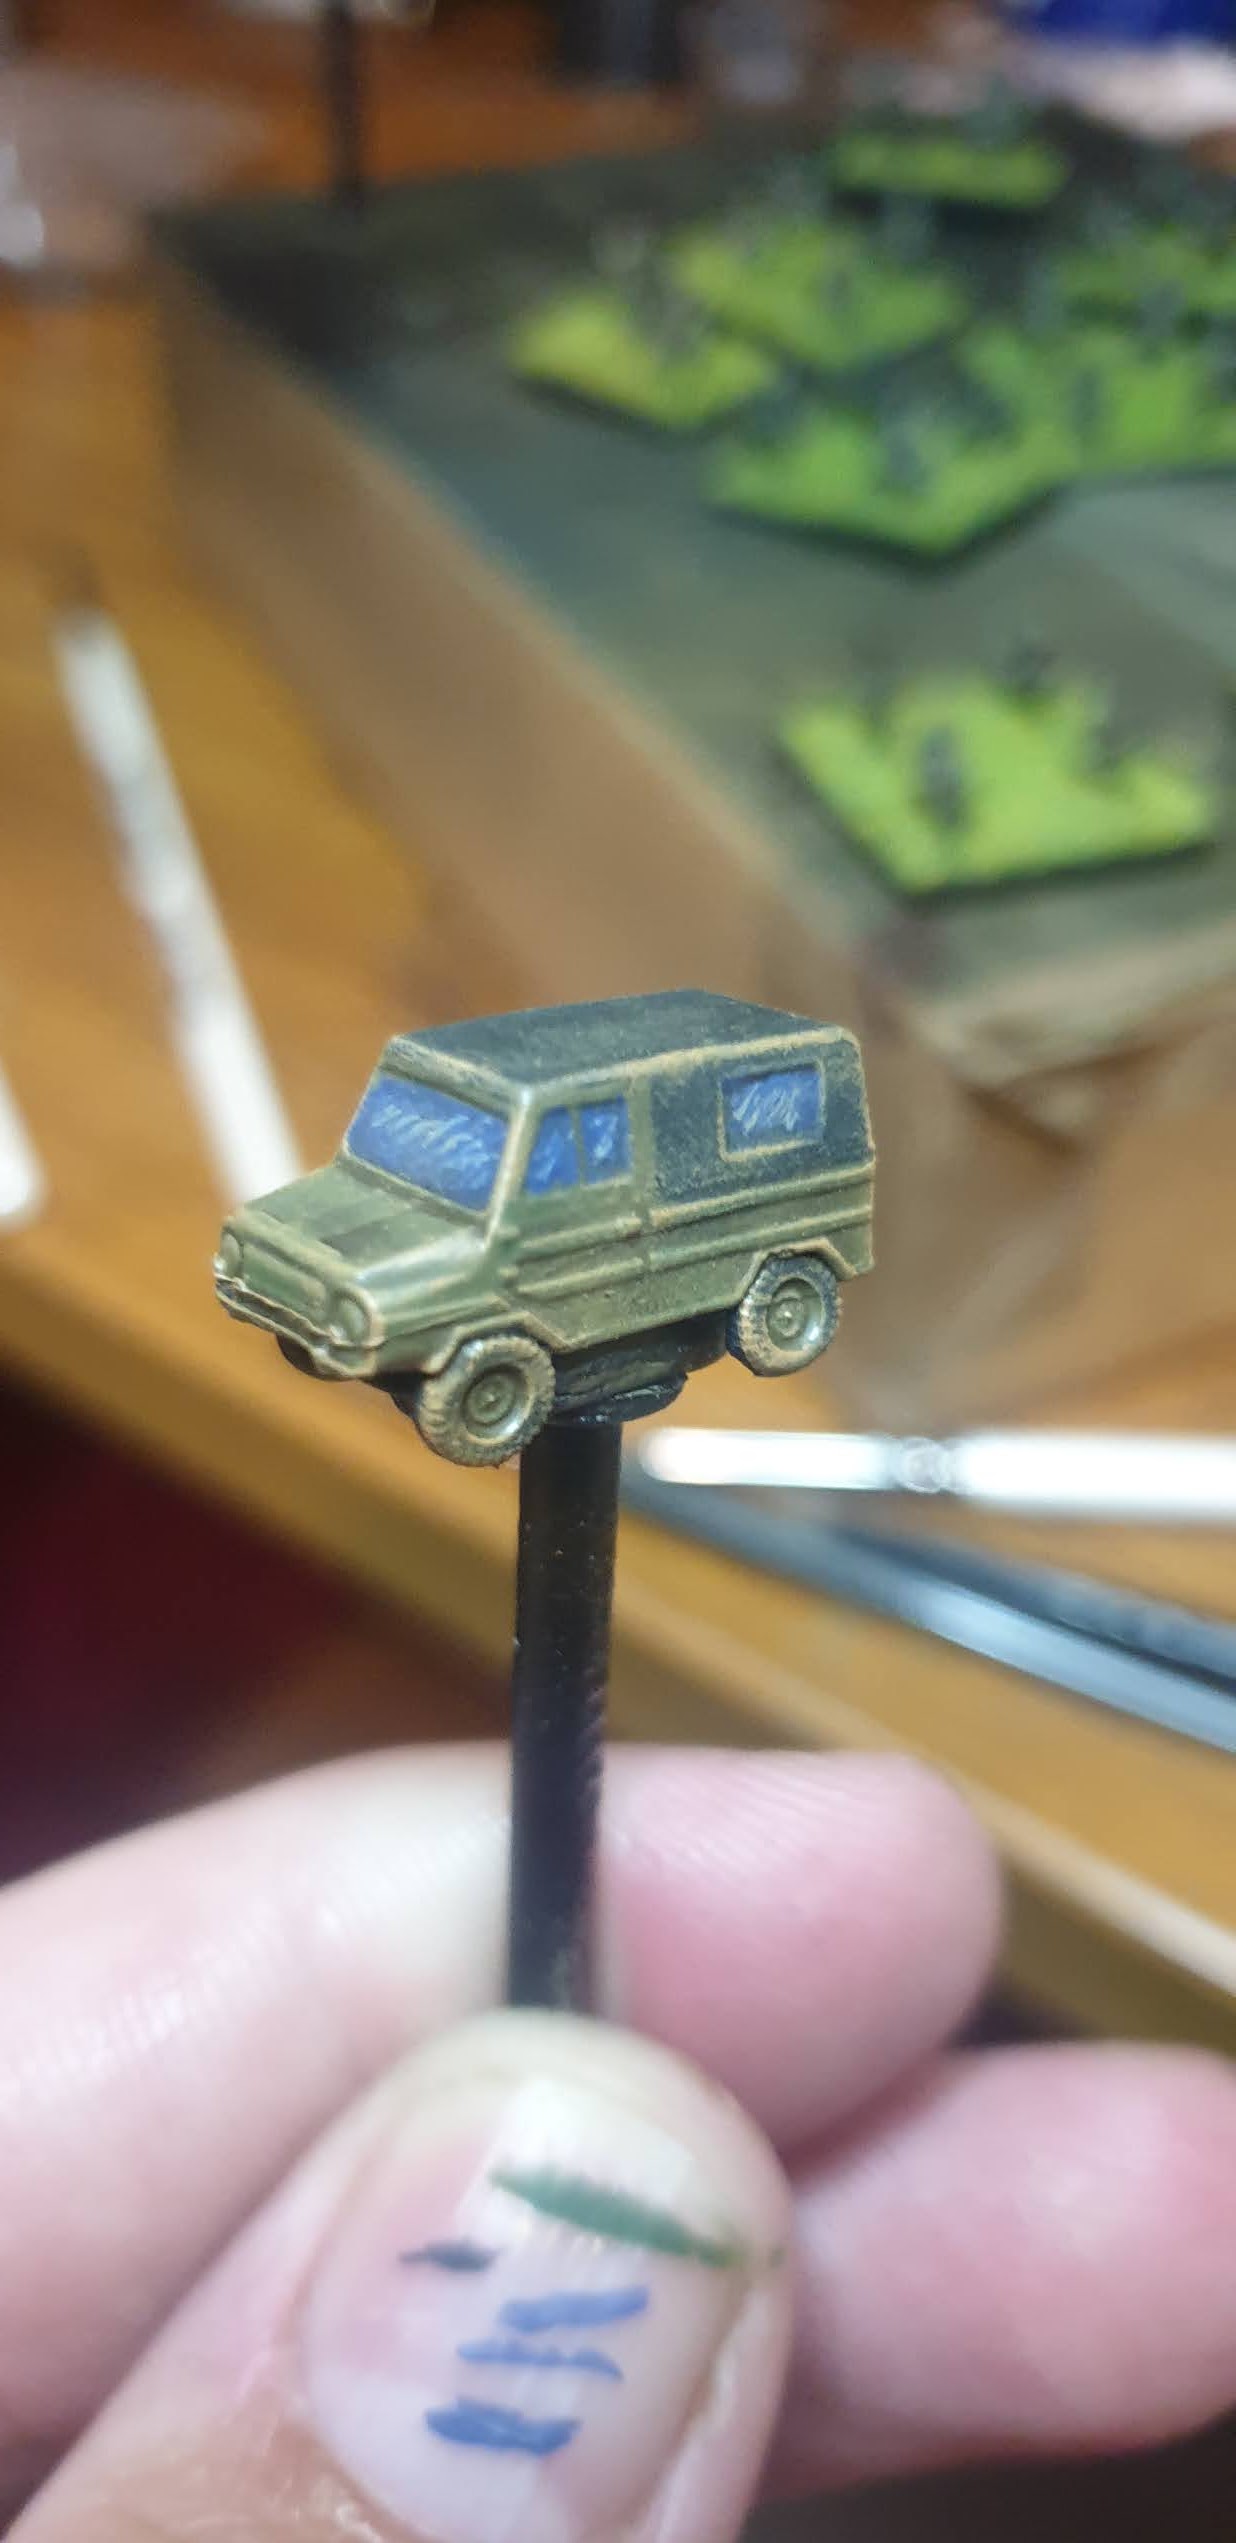
Honestly I'm a British Landrover


So the Spetsnaz themselves were painted with two major differences, their berets and uniform. They needed to stand out and lots of pictures show them with a camouflaged uniform and blue berets. I decided I would follow my russian recipe substituting the basecoat with the British uniform colour and wash.

  • Flames of war Russian Uniform 924, for the all over basecoat
  • Vallejo German Grey 70.995 for the boots and weapons
  • Flames of war Flat Earth 983 for the stocks and magazines
  • Vallejo Sunny Skin Tone 70.845 for the flesh
  • Vallejo Khaki 70.988 for the webbing 
  • Vallejo Luftwaffe Uniform 70.816, for the berets
  • Citadel Nuln Oil for the wash
  • Vallejo Matt Varnish 70.520, for the finish
  • Generic Burnt Umber acrylic for the bases.


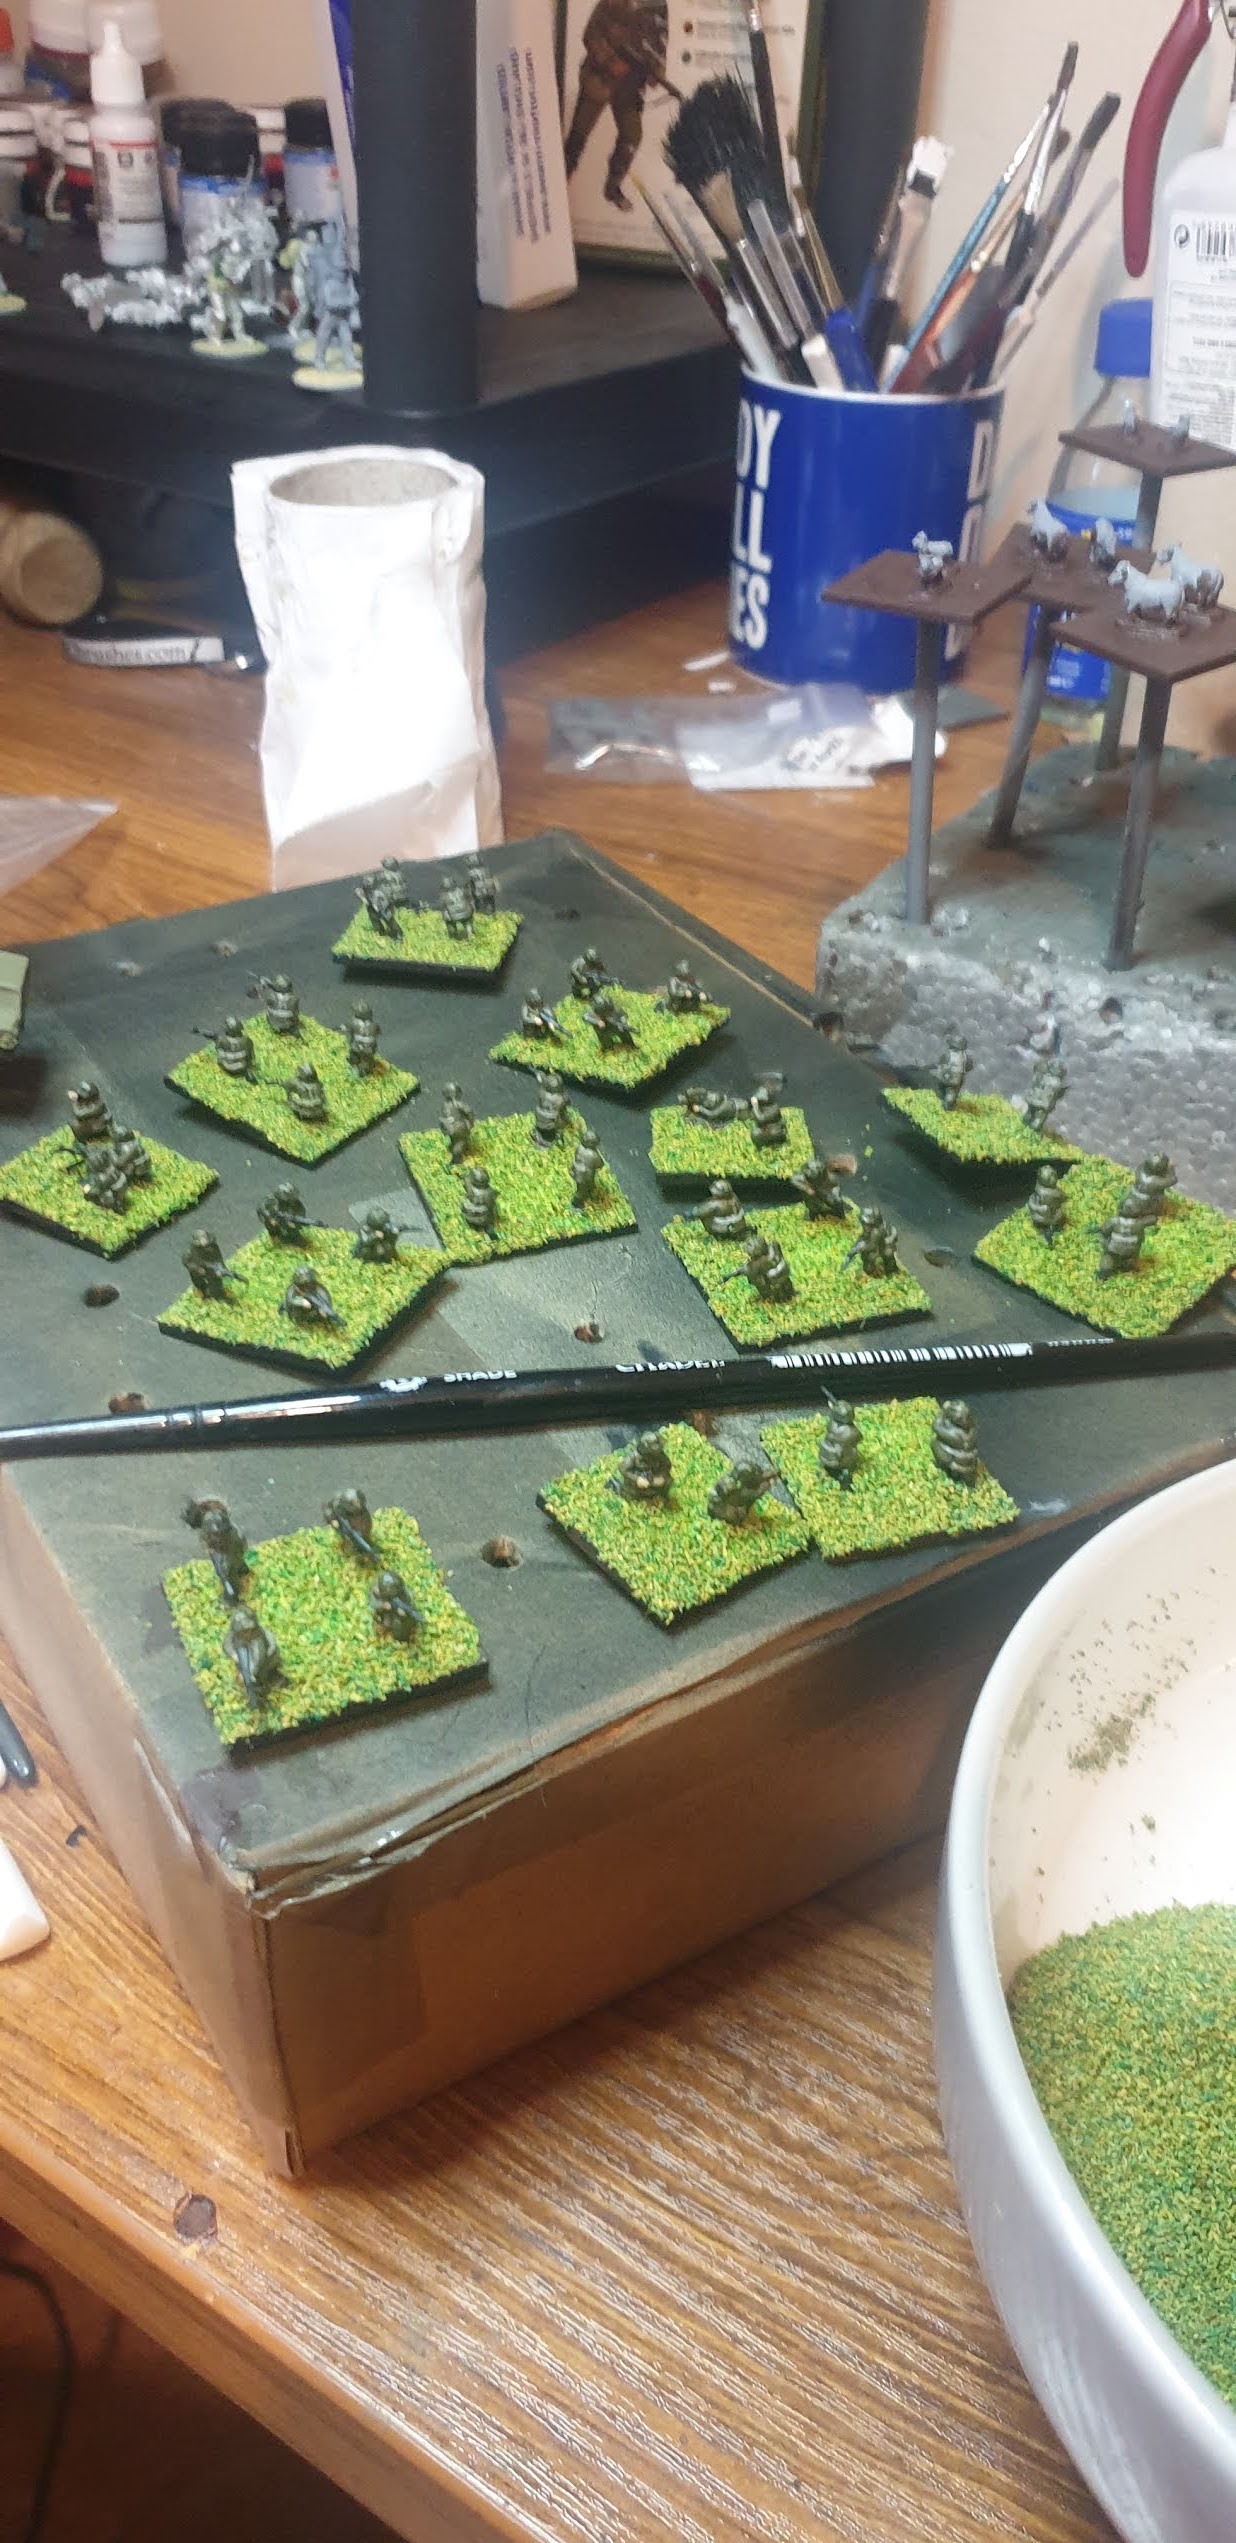
Jarvis flock mix added


Decoy Sheep and Cows

  • Generic Black Primer
  • Vallejo Stone Grey 70.844, basecoat on sheep
  • Flames of war Ivory 918 drybrush on the sheep only, basecoat on the cows
  • Vallejo German Grey 70.995, random black spots on cows
  • Vallejo Matt Varnish 70.520 for the finish
  • Generic Burnt Umber acrylic for the bases.


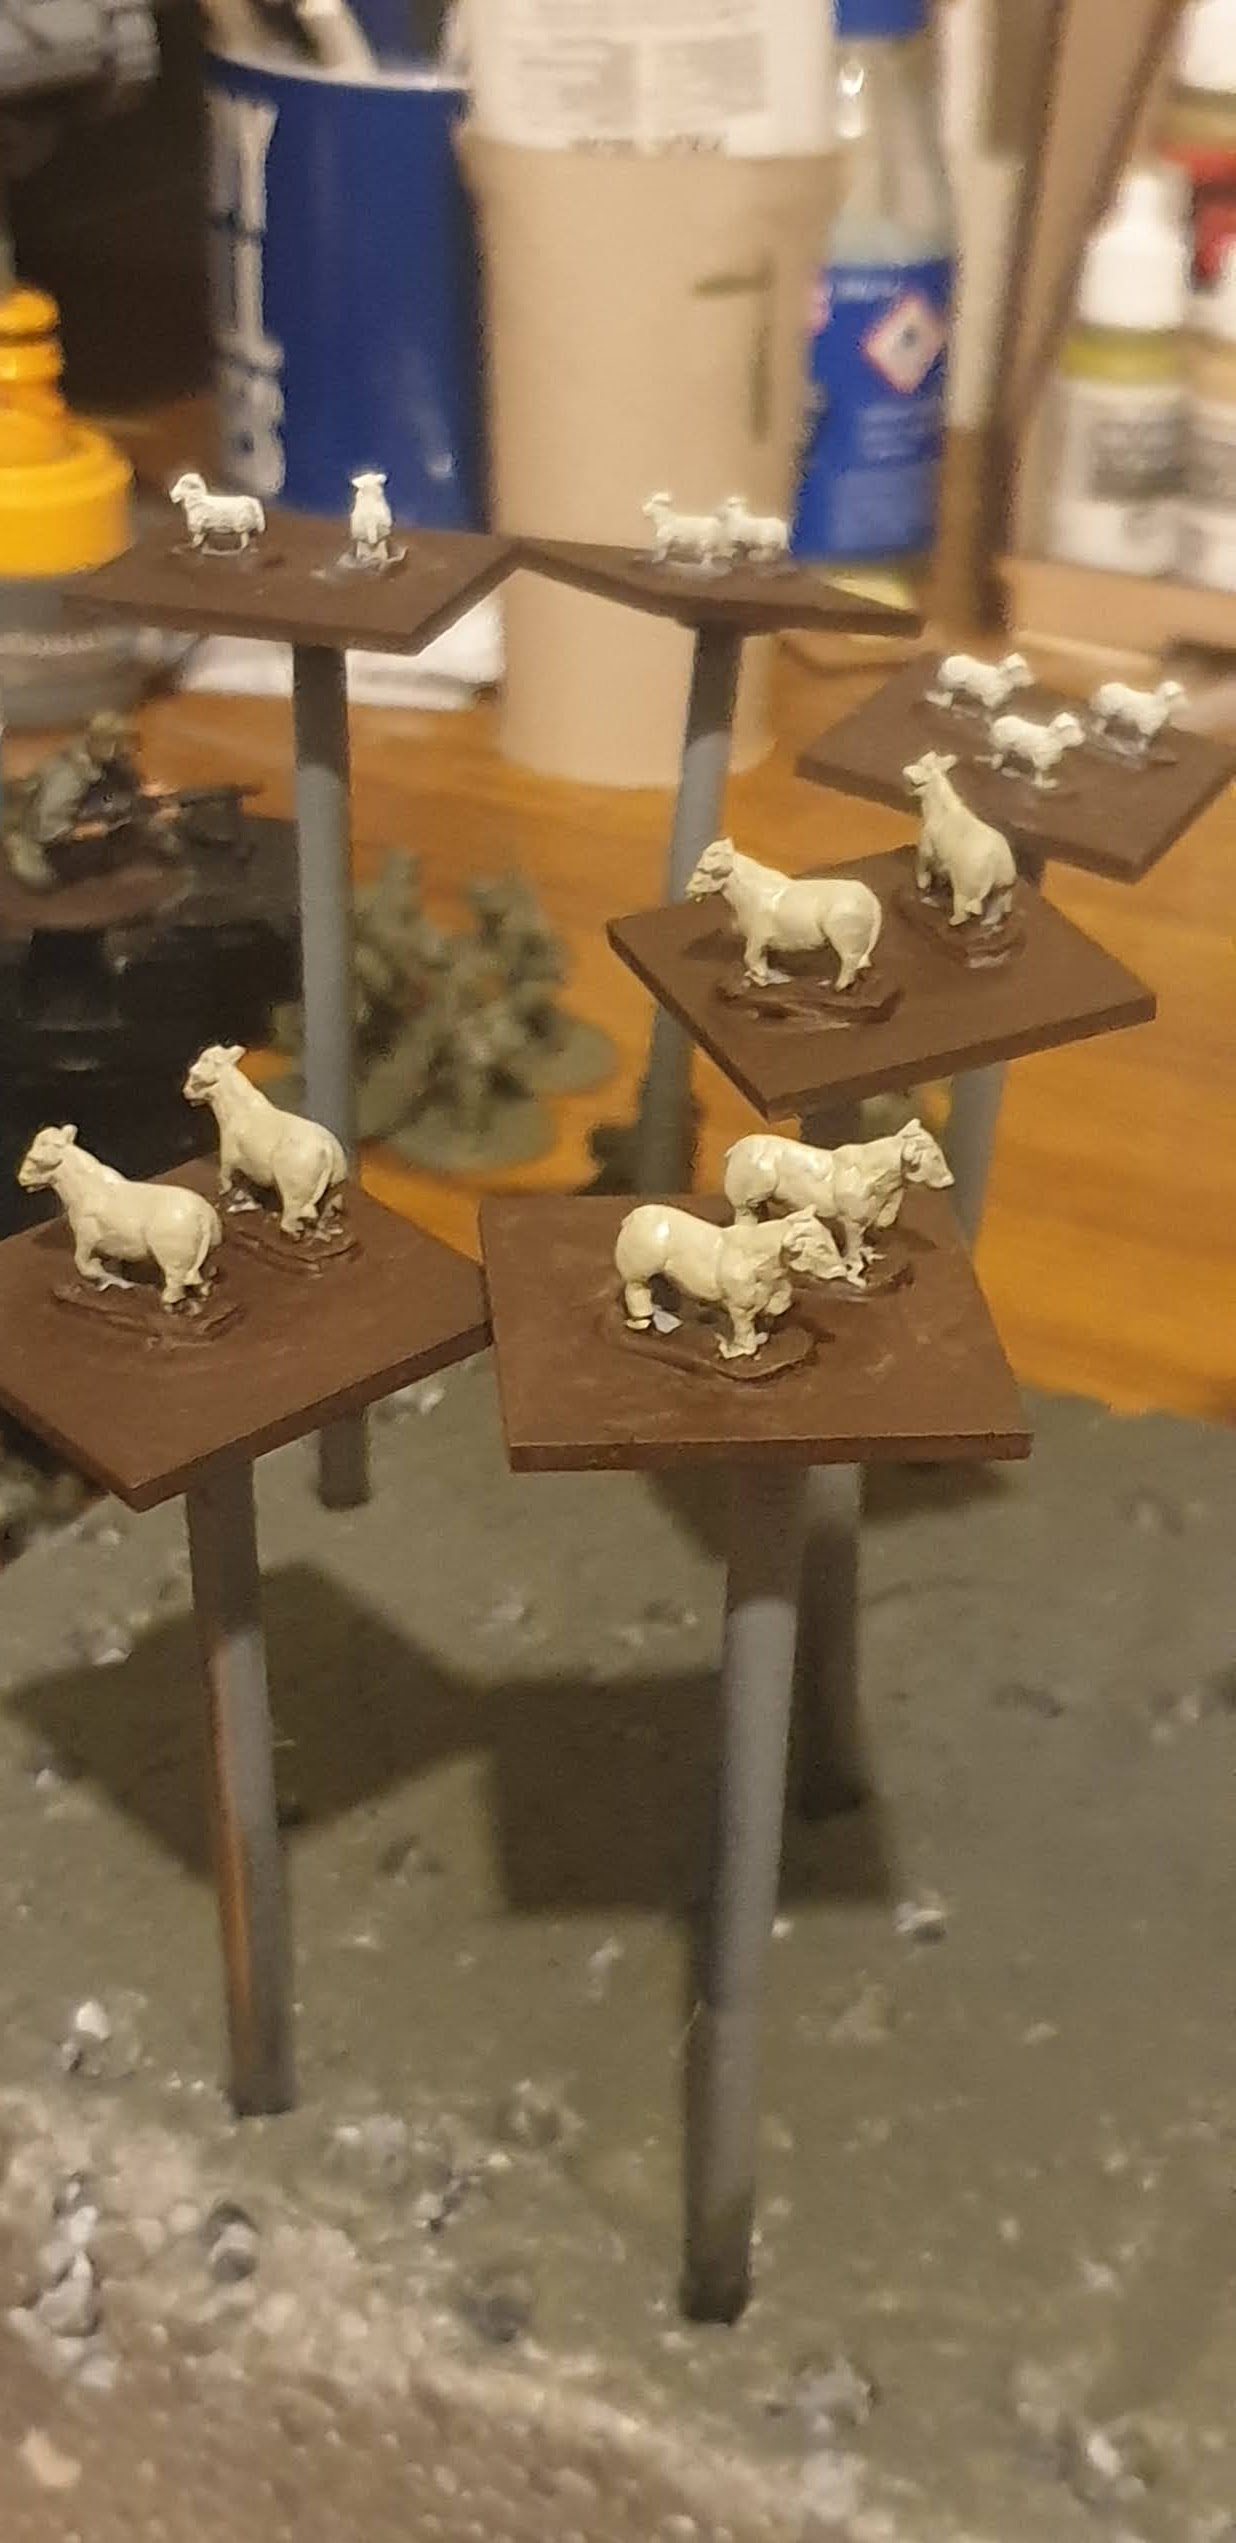
So the sheep were very easy, a quick coat of the grey over the primer and then a drybrush of Ivory. I did consider a wash, but at that size I thought it might make them too dark on the table
For the cows I did try using Stone Grey as a basecoat but it wasn't a good enough contrast to the black at this scale. Again with the wash, I actually tried to use it for the black patches, but this was painfully slow, so I switched to the German Grey.

Sheep

Cows 

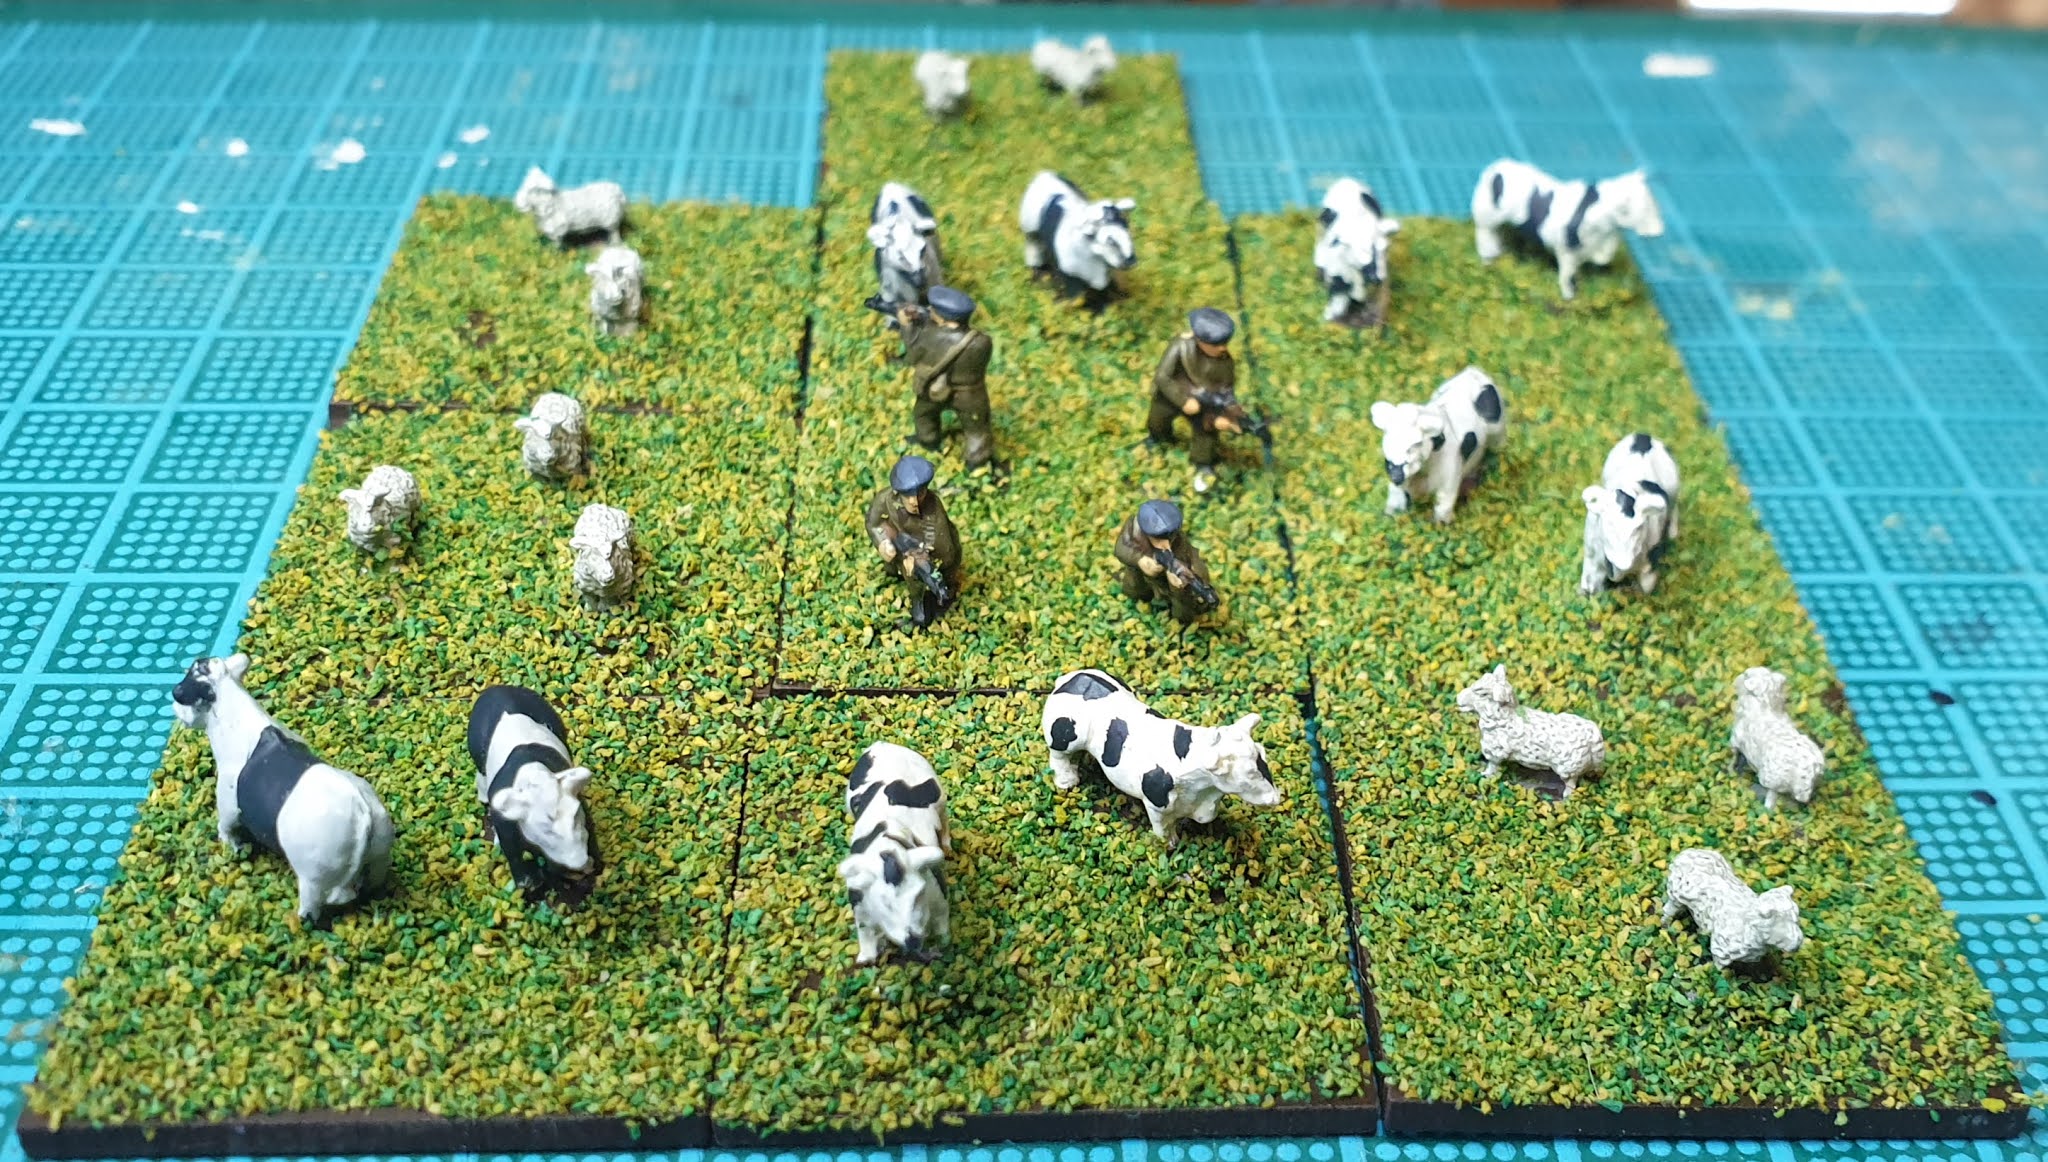
Sneaky Spetsnaz hiding in the cattle

Final thoughts

The cattle won't win any prizes at the local agricultural show, they are a bit scruffy, but at the normal three feet on the table you cant tell. I'm pretty sure they'll add some fluff to the table just like having telegraph poles, which i need to source. As for using them to hide the special forces, we will just have to wait and see if it makes any difference.
Really happy with the Spetsnaz and their little jeep, however I think ill be finding them a landrover or maybe even a civilian car or van, help them hide a little better.


For more Northag:


Sunday 6 September 2020

NORTHAG 10mm BAOR Infantry

 10mm BAOR Infantry


Disruptive Pattern Material (DPM)

The question is do you paint the camouflage on a 10mm figure? Answer is; if your reading this your a wargamer and you really want too! I love DPM however having painted modern Multicam on 28mm figures I really don't fancy it. Also will it be seen? Not really although that's the whole point I suppose. I've thought lots about this and I feel there are two options for me; I paint them green with a black wash and hope it looks right or do the same and say they're wearing their NBC suits! Most people on the Facebook page are having similar thoughts so i guess that's the solution, let people guess what it is!

Paints

  • Generic black primer
  • Flames of war Russian Uniform 924 for the basecoat and missile weapons 
  • Vallejo Black Grey 70.862 for the boots and weapons
  • Vallejo Sunny Skin Tone 70.845 for the flesh
  • Flames of war Green Grey 886 for the webbing
  • Flames of war Flat Earth 983 for the stocks, you can use Black Grey for plastic stocks
  • Flames of war Reflective green 890 for the helmet cover
  • Vallejo Khaki 70.988 for the helmet scrim
  • Citadel Nuln Oil wash all over
  • Generic Burnt Umber for the MDF base
  • Vallejo Matt Varnish 70.520 to seal the model.
Little nod to Mark Greenwald on the Northag Facebook page for the original recipe which I adapted to my collection.

PVA, yes there are cows in this picture

Primed Black, sneaky Spetsnaz team and transport in the bottom left corner


Base colour of Russian Uniform 

Base colours applied


Nuln Oil was applied

Varnish applied

Mixture of Jarvis Flock applied

Finished product

Rifle Team


Milan Team


Blowpipe Team


Carl Gustav Team


Sustained fire GPMG
Attached on the base at an angle as a test to make it easily recognisable 


Command Team


Sniper/ Forward Observer Team

Final thoughts

I'm really happy with how these turned out. The mobile pictures don't really do the models justice. I painted them quickly due to a game being in the pipeline, and nothing compares to painting the Russians! Playing the game proved that on the tabletop you really can't discern any detail. I'm thinking of painting the edges of the MDF bases blue for NATO and red for the Russians to help, and maybe some other marking for different weapon systems.
I have some Spetsnaz to show off next, with some animals to paint as there hidden markers, should be interesting!

More Northag 


Saturday 5 September 2020

NORTHAG 10mm Russian Infantry

 10mm Russian Infantry


So onto something I've been dreading and that is painting the 100 plus Russian infantry! After a little research and question asking on the Northag Facebook page I had a few ideas on what colours I could use. 
The next question was whether or not to paint them on the sprue or the base? Initially I chose the sprue, but half way through I changed my mind and switched to the bases, its all trial and error especially with a new scale. I mount my 15mm on nails first for painting and then transfer them to the base afterwards.

Paints

  • Vallejo Middlestone 70.882 for the Basecoat (although halfway through I used a generic black primer first to help highlight any gaps)
  • Vallejo German Grey 70.995 for the boots and weapons
  • Flames of war Flat Earth 983 for the stocks and magazines
  • Vallejo Sunny Skin Tone 70.845 for the flesh
  • Vallejo Khaki 70.988 for the webbing 
  • Flames of War Russian Uniform 924 for the helmet and missile weapons
  • Citadel Agrax Earthshade for the wash
  • Vallejo Matt Varnish 70.520 for the finish
  • Generic Burnt Umber acrylic for the bases.


Finally before I could start some minor cleaning up with scalpel, and then onto the first coat, its been said you don't need to prime these models so I thought I'd try it out. Later on through the process I noticed gaps where I'd missed spots, so I returned to my tried and tested prime with a black spray can at the halfway point.

So I started painting four to completion to test the scheme.


Post wash.

These are the clips I used for handles and the drying off of the wash. I was tired and didn't consider that the wash would pool in the wrong places! I managed to rectify most of it with a little water the next day.

On the bases so much easier!

A finished selection


Based with a mixture of Jarvis flocks.
At this scale I'm not even attempting to texture the bases!

Final thoughts

Firstly I thought I'd taken more photos of the painting process, I hadn't! You can paint directly onto the models without primer, I won't again as it hides my mistakes until later on, maybe I need glasses?? 
Whilst Im not the best painter I'm learning all the time, if you don't thin your paints enough at this scale the detail will disappear. Also the same for you wash, too much and you'll obscure everything you've done. 
10mm doesn't require you to be that accurate and detailed, once your three feet away you'll be lucky to see any detail. However if I splog sunny skin tone on the uniform I have to touch it all up and hide it.
I painted them as I've said in two batches and found that attaching them to the bases mounted on a six inch nail sped up the process. This also allows me to easily twist it to get the desired angle to paint. 
Some minor flash is visible close up but not when it's on the table.
Honestly whilst its time consuming because there are so many, they weren't that hard to paint.

Next up the British!


The Horde

Sustained fire PKM

Snipers 

Sagger AT3

Spigot AT4

AGS 17

SA 7 Grail